Wednesday, January 15, 2014

CHA 2014 - Focus on Silhouette products


My co-worker Bonnie and I went to CHA's (Craft and Hobby Association) winter convention in Anaheim, CA yesterday.  We were completely overwhelmed with all of the new craft products we discovered!  We were able to help order some Silhouette products for the store (see below).  We also got to help find new product lines from Authentique, Bo-Bunny, Echo Park, Graphic 45, along with so many other brands.  We can't wait for them to arrive at the store!

My main focus was Silhouette products, and finding other products we can cut with it!  I was a bit disappointed by the minimal winter release of products by Silhouette America, as there weren't many in number.

I was excited by the new Corrugated cardstock (it comes in both white and kraft in one package of 3 sheets each).  The corrugation is flatter than what you'd see in a box, and of course, pristine!  I can't wait to get some!  I'm also really excited by the new Washi pack they are releasing!  Many cute patterns in a single package, all having the translucent washi tape characteristic we all love!

Also, there will be new LIGHT sticky cutting mats (in both 12x12 and 8.5x12 sizes) for adhering lighter weight materials, as well as minimizing curling when removing product from the mats.  Available soon is cuttable vellum (a thicker variety of plain vellum), but the staff didn't know if it was printable.  I'll let you know when I get my hands on them, but I don't know if will work any better than any of the vellums I already have in my stash.  Other new products include a new Cameo tote (same design as the old tote, except with a sturdier tweed and leather construction), new stencil material for fabric printing, and a black and white sketch pen pack.

Also being pushed was their new Silhouette Connect software.  It allows users of Adobe Illustrator and Corel Draw to send projects created on these platforms directly to their Silhouette for cutting, without any need of converting them to the Silhouette Studio format.  I do not use either product, but I know how useful this conversion program would be for these users.  It is available now.

I also spoke with the owners of SRM, sellers of very nice stickers, clear party boxes, treat bags, and Twinery twine.  Their company is releasing 12x24 sheets of vinyl in many, many colors and styles!  I can't wait for the store to get some in...  glitter vinyl (!!!) (very, very cool looking!), metallic vinyls (the brushed pewter and brushed red metallic are REALLY neat!), as well as a rainbow of colors!  It will be fun to start creating with the different vinyl products.

Serendipitously (like so much of what happens on the exhibitor floor of a convention!), I also encountered a Canadian fabric company called Camelot.  Amongst other fabrics, they produce felts for crafting!  Normally, I tell people that they cannot easily cut felt on their Silhouette... Felt is a product that is not woven, so the felting material would stick to their mats and ruin it, as well as the fact that soft felt (most felts sold in craft stores) are so loose that they would shift while cutting, thus making for a not-so crisp cut (if at all).

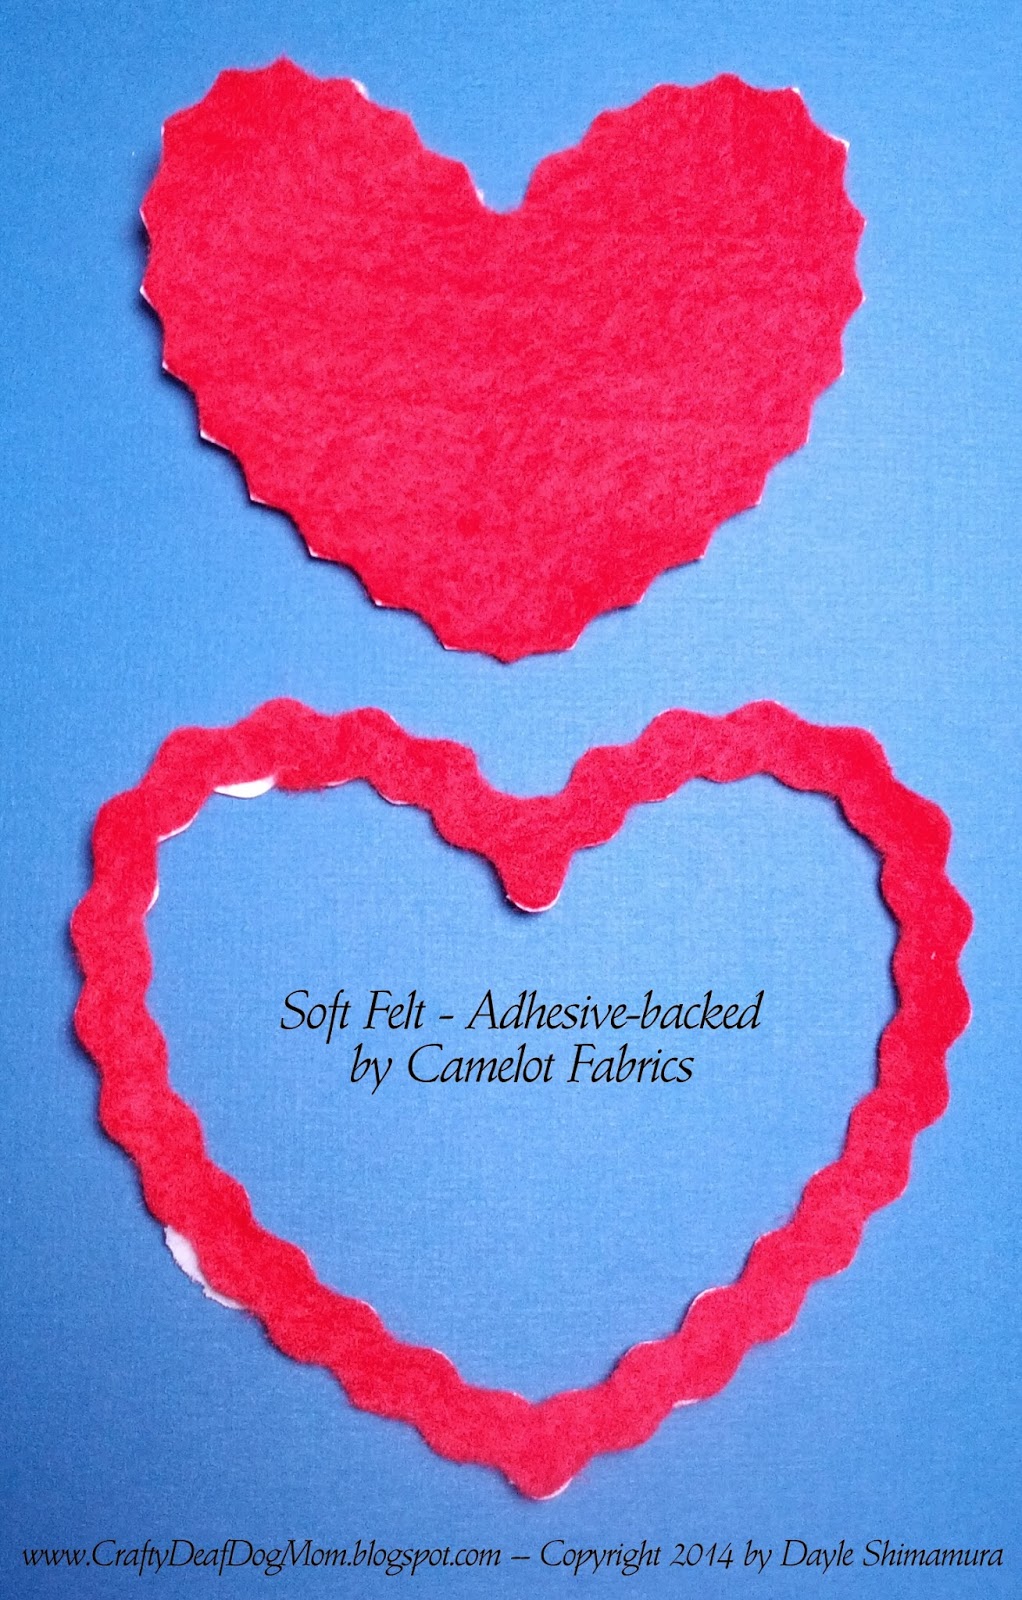
However, Camelot makes a HARD felt (stiffened) that is still fuzzy, but has body enough to cut!  I tried some of their felt products today, and found that currently, their adhesive-backed felts worked okay, both hard and soft felt, but the hard felt with NO adhesive backing worked like a charm!  I used my old mats that still had some stick to them, but old enough that it wouldn't grip any of the loose fibers.  I cut a simple scalloped heart frame to see if it would cut something with a little intricacy, but not too detailed or simple. 
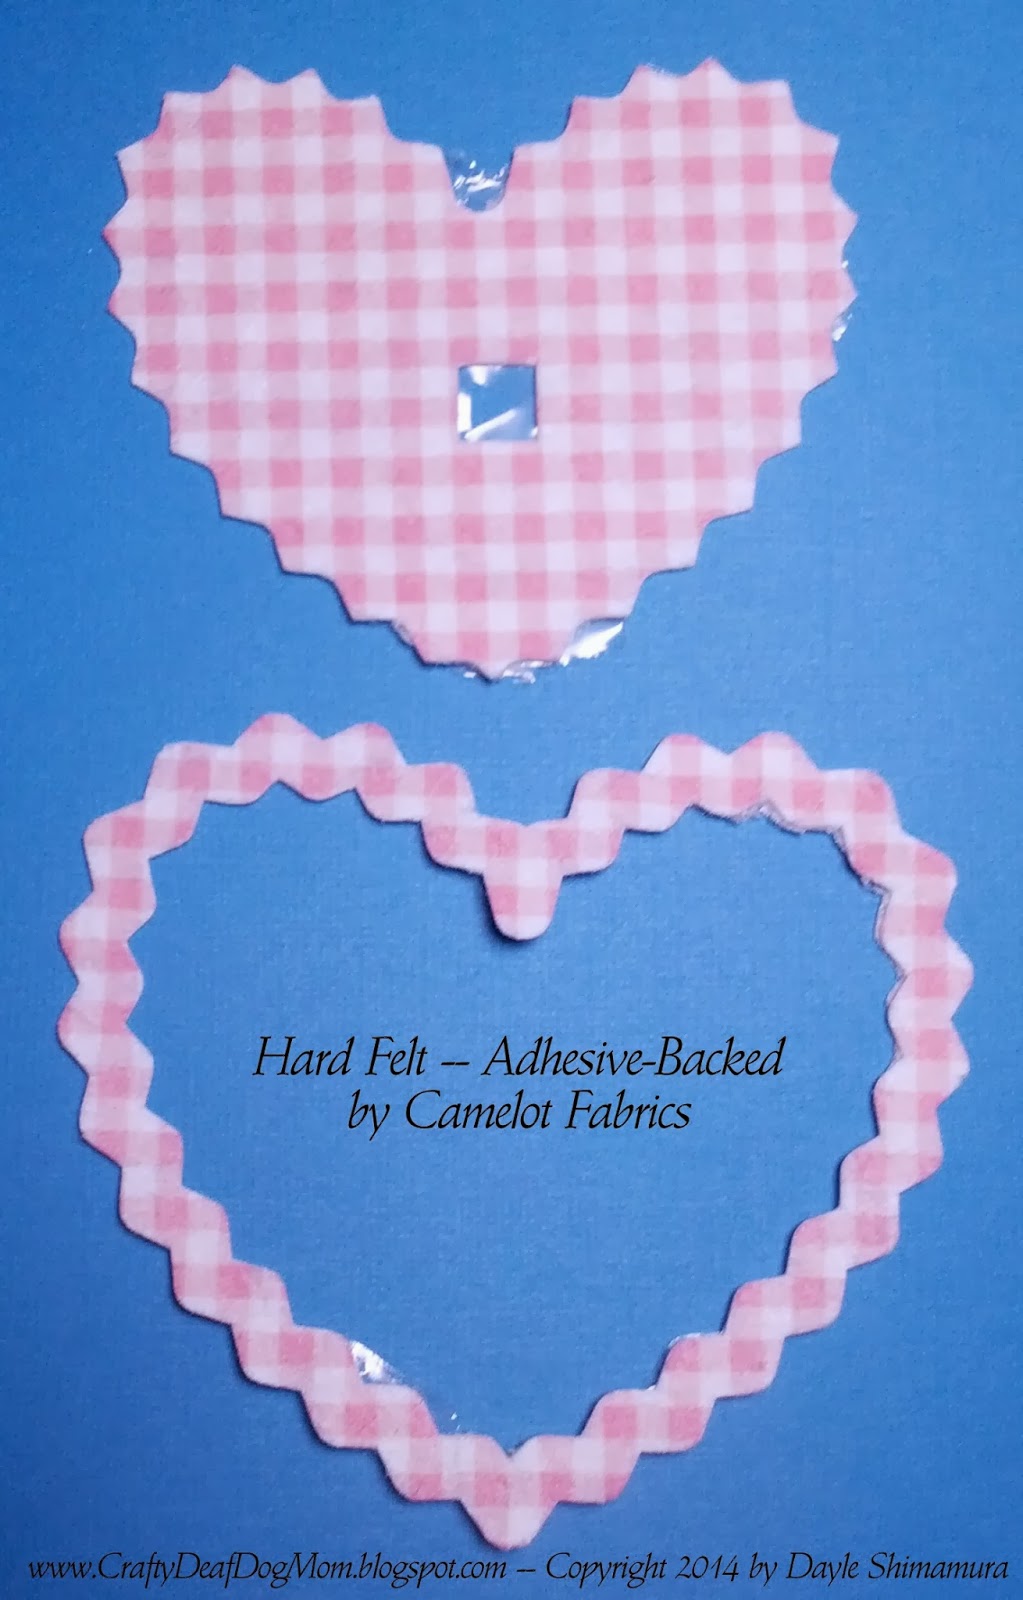
The soft adhesive-backed felt surprisingly cut well, but still left a soft edge (like I guess you'd want with felt, anyways).  The hard adhesive-backed felt did not cut very well.  I think it was the very thin plastic backing they used on it...  it adhered to the mat, but the felt itself did not cut all the way through, either.  The hard felt, no adhesive, gave the crispest cut of all, did NOT leave any felt residue on my old mat (surprise!  but still was held to the mat well), and cut all the way through on a lower blade setting.  It is still a little fuzzy (not soft, but still looks like felt), unlike the adhesive backed hard felt (which looked more like canvas).  It left me wanting more!!!  Gena, my boss at the store, was able to get them to give me more samples to play with.  I gave Camelot some feedback about how their product cut, and what I would change to make it worthwhile for Silhouette users.  Hoping they succeed in selling the felt for manufacturing.  But right now, I want more of their hard felt....  and I want it now!  *sigh*...  oh well.  Hopefully I will be able to get some, but for now, the samples will have to do.

I will get more CHA info to you once my brain settles...  it was a very long and overwhelming day, but soooo much fun!  We really needed two days, at least...

Happy Crafting, and drooling :-)
-Dayle

Monday, December 23, 2013

Happy Holidays to you All!

Hi everyone!
I had been very busy with agility trials and cleaning for the holidays, that I haven't had a chance to do any crafting, much less keep up with this blog...  sorry about that!  

My sister-in-law and niece are currently in town, so we all are decorating and eating and cooking and eating and shopping and eating... you get the idea!  The dogs love the extra attention and play time (and treats) they are getting from them, too!  It has been a bit of whirlwind, but a lovely swirl of excitement for all.

We all wish you a very happy holiday season.  Hug your friends (fur and not), and spread the joy of the season all year through.  Peace and happiness to you all!

Here is our Christmas photo for this year.  Enjoy!

Love,
Dayle

Thursday, December 5, 2013

C-ATCH Omiyage

In Japanese, Omiyage (oh-me-yah-geh) means souvenier, but more specifically, an edible treat representative of the visited location given to friends and co-workers.  In Hawai'i, though, the meaning of omiyage has evolved into an edible present given for any occasion when one visits someone's home, which in Japan, is called temiyage (teh-me-yah-geh).  No one in Hawai'i calls it temiyage, they generally use omiyage, and that is what I grew up saying.  I've learned of the difference since then, but I still refer to such gifts as omiyage.  In Japan, it is equally important that the wrapping be as special as the food gift inside, or even more so.  Beautiful presentation is a must... it shows that care and thought has been made for the recipient.

When my friends Juanita and Laura finally earned their C-ATCH titles (CPE [Canine Performance Events] Agility Trial Champion) with their dogs Gemma and Lego (respectively) this past weekend, I had to make something special just for them, so I thought of giving a little omiyage for them and the dogs :-)  And of course, I created the "wrapping" specially for them.

Here's what I came up with:  a bone box filled with special doggy treats, with an award ribbon in the CPE color of teal.


I cut the box from a bone box I found in the Silhouette online store, and used a ribbon design I also had purchased previously from the store (see NATCH Charlie for another project where I used the ribbon design).  I used an SEI "stone" woven sheet for the bone, with a teal mat.  I used Imaginisce Good Dog collection #400106, paw prints cardstock for the box, and the teal color (backside of the paw print cardstock).

I designed the inside of the ribbon circle by creating a printable circle with the lettering, gradiated yellow background, and a trophy design that I printed instead of cut.  I print and cut the middle design on Silhouette's adhesive backed white sticker sheets.  Here are close ups of the completed ribbon, and closed and open box:

Each box was stuffed with lots of doggie treats for well-earned titles!  Unfortunately, my friends did not show up to class to receive their gifts, but they will get them at next week's class. 

Hoping your holiday season is full of omiyage and temiyage, both giving and receiving!
-Dayle

Tuesday, December 3, 2013

Survival of the fittest...

... or just plain surviving.  November is finally past us, and what a whirlwind it was.  Attending agility trials EVERY weekend was completely exhausting, particularly when I was the chief course builder for 4 of the 5 trials!  I will NEVER do that again!  I think I came out of it okay...  popped a rotator cuff that still hurts, my brain is completely fried, but my back, feet and knees all feel great.  All in all, considering all of the wear and tear and stress, I made it through fairly well.  Alva got two chiropractor treatments in the middle of it all (thankfully), and also survived fairly well.  He stayed focused and ran fast through most of the trials, although by the time we reached this past weekend, he was starting to act a bit goofy, visiting the judge and a jump setter, stuff he hasn't done since we started the sport!  He's either reverting to puppy-hood in his old age, or he was getting loopy by having too many trials in a row, too.  Or his handler was getting loopy and not paying much attention to *her* handling :-p  Probably the latter, but I'm sure there was some loopy-ness on his part!

No Chances Qs...  but lots of great runs.  Alva earned his Open All-Around award in NADAC (100 pts. in all the games, 200 pts. in Regular) with a smokin' great Strategic Hoopers run.  Here's the video of the run:
                                            Alva - Open Strategic Hoopers - Nov 15, 2013 

He also earned his first Elite Hoopers Q, but the videographer missed that run...  too bad.  It was one of the few great runs he had in Vegas.  I'll be uploading all of the videos in a few weeks.  Check out our YouTube channel, DeafSheltieMom, in the coming weeks for new videos from the trials that had videographers this past month.

I have to make some gifts for friends who earned their C-ATCHs this past weekend at the CPE trial.  I'll upload pictures of them tomorrow. 

Until then,
-Dayle

Wednesday, November 6, 2013

Trials, trials, trials...

So it has begun...    The pups and I have begun our November whirlwind of agility trials.  Unfortunately, Tesla is in the middle of her first season, so she gets to miss all of the fun.  Or, we get to miss all of her moodiness, not sure who got the better of the deal :-) 

We had a CPE trial last weekend, where only Alva competed.  We were great on day 1, not so much on day 2, but we had lots of fun, which really is what it is all about.  Hutch and Tesla stayed home.  Hutch is essentially retired.  He just can't handle the stress of running agility in a public arena.  He will continue to run EGC (which he LOVES at home, and seems to handle better in public), and Tunnelers, but that's about it.  He would be happier staying at home getting cookies and love from Tom.  We'll continue to play in class, but he even shows stress there, so we'll keep an eye on how much we push him.

This weekend, Hutch, Alva and I head up to Bakersfield for a NADAC trial.  Friday is a full day of EGC, so it is worth the trip for Hutch.  We are staying for Saturday's runs because it includes Chances (the distance class that Alva needs desperately), but we are leaving early Sunday morning so I can run errands in the afternoon at home, and Hutch doesn't have to deal with everyone tearing down.

Next weekend we have a local 3-day NADAC trial, and the weekend after that, Alva and I are heading to Las Vegas for another 3-day NADAC trial.  We end the month (and start December) with a CPE trial in La Jolla.  Whew!!!!  If we survive it all, we have one week off until we head out to Tucson, AZ for our final NADAC trial of the year.  Hopefully, we'll get at least ONE Chances Q with all of those opportunities!!!!

In between, I hope to start a Christmas project that I have been mulling...  and I have to clean the house for my sister-in-law and niece who are coming for the holidays.  Breathe?  what's that???

-Dayle


Thursday, October 31, 2013

Happy Halloween!

Happy Halloween everyone!

I'm normally not a Halloween kinda gal....  it really is my least favorite holiday.  Don't know why... probably because I despise dressing up of any kind.  I enjoy seeing OTHER people dressed up, but I just don't get into it.  Probably goes back to hating make up of any kind, too.  It just isn't me.  Y'know, keep it real, yo....  Probably also has to do with wanting to be a wall-flower.  Just don't like to draw attention to myself.

However, I DO love crafting, and with so many really CUTE Halloween paper lines out this year, I HAD to do something with the papers I bought :-) .   The first line I purchased was the Pebbles Thirty One line...  super simple designs (many can be used year 'round) and super cute!  I have been inspired by the many beautiful banners Dannielle Robeson has been making for classes at the store, so I decided to make a colorful banner using the Thirty One line.  I also wanted to continue using my Spellbinders dies and impressions.

Here is what I finally came up with, hanging in front of my front door:
 and here is a better picture of the colors of the banner, photo taken on a table:
  

Since I wanted to use the cute shapes in the Pebbles line, I used Splash of Color Viva Dimensional Glitter liners in Amber, Hematite, and Holographic clear to color in the shapes (orange, black and clear glitter).  After they dried, I fussy cut each of the pieces out.  Here is a close up the completed pieces, attached to the die cut pieces, with green tulle ribbon.  I used some of the chevron paper from the line as well to back the glittered pieces.


Imperial Gold Rounds w/ medallion after embossing, inking

I wanted to use my Spellbinder dies, so  I picked shapes that would look good together.  I chose the Big Scallop Circles (Grand, SM and LG) of differing sizes for the most of the medallion pieces, and Labels 28 (plus Decorative Labels 28) for the letter pieces.  I also embossed using the Imperial Gold Rounds in some of the medallion pieces, and Delicate Doilies for the starburst black piece in the medallions.


Here is a close up of the completed medallion piece, with different layers.  I added rhinestones using Silhouette America's heat transfer-backed rhinestones and Rhinestone Setter tool.  The lacy white piece and green glitter piece are SEI woven sheets.  The green tulle ribbon is from Webster's Pages, and plain cardstock pieces are from American Crafts.  I really love how all of the pieces look together!


Then it was time to attack the letter pieces.  Using my Silhouette Cameo, I cut out the letters for "Boo!"  The offset orange pieces were cut out of a Core'dinations cardstock, and the inside letter pieces were cut out of Silhouette's double-sided adhesive sheets.


On the right, is what the letters look like with the double-sided adhesive cut out attached.  The double-sided adhesive sheet has two sides, a white and a yellow.  The yellow side is removed so that I could stick the letter correctly to the orange mat. 


On the left is what the letter looks like with the white piece removed, i.e., with the adhesive exposed.  I can now apply glitter to the exposed adhesive!  I used a soft brush to spread the glitter around and adhere it well to the letters.


Here are pictures of the glittering process, and the final glittered letters.  I used foam dots to adhere the letters to the die cut label pieces to make them pop.


I also embossed/cut out of the orange medallion piece using the Imperial Gold Round Facet piece.  It has cut outs on it, as well as embossing.  I love the Imperial Gold enhancing elements lines... you can mix them with any die shapes you have to make them embossed/debossed/letterpressed!  The possibilities are endless!  I'm sure you will be seeing more of them on this blog :-)...  I colored in the embossed part with a black marker, then colored over it with a Sakura Clear Stardust pen.  Then I adhered a black rhinestone in the center with the Silhouette Rhinestone setter, as well as orange rhinestones around the border of the letter banner piece.

Here are close ups of the letter pieces, and the medallions together on the banner.  I attached black jute to the backs of each piece for hanging.


Here are close ups of the three sections of the banner, so you can see the details and how it was assembled.  I'm very proud of how the banner turned out... even one of the trick-or-treaters complimented me on the banner :-D  And from sugar-high kids, that's saying something!


It was such a stretch for me to "go Halloween" :-)  But once I started crafting, I really went for it. 

Now that Halloween is almost over, I'll have the banner displayed at Cool Scrapbook Stuff, where I work.  Come on in and see it in person!


Hope you had a fun, safe, and sugar-filled Halloween!

-Dayle

Friday, October 25, 2013

Oops!

It was last Sunday...  I received a text from my hubby while I was at an agility trial, asking me to bring home dinner.  It was not an unusual request, but seemed a bit odd considering I'd be ending late.  So when I was finally done and on my way home, I called him... he wanted sushi to celebrate his birthday!  OOOPS!!!!!!!   Uh, oh...  I completely forgot!  It never crossed my mind, all month long!  It's not like me...  I usually try to remember to do something, even if it is just to suggest we go out to dinner a little later in the week to celebrate.  But not this year.  Nada.  Luckily, I have a very forgiving husband. 

So this week, I made him a belated birthday card.  I decided to create a card using die cuts the old fashioned way, using my Spellbinders.  I've seen many elaborate nested dies cards, and really wanted to do that, too.  I also have a great collection of SEI designer paper that I adore (foiled kraft paper and woven paper), and need to craft with.  So with that, I pulled out my dies (that are now fairly well organized :-) ) and created a mix of dies that went well together.  I also pulled out my papers.  I chose a teal organic chevron foil design for the background card.  Then I pulled some basic teal papers (bo-bunny, core'dinations) to go with the white woven sheet and the teal foil chevron.  I kept it simple by cutting the different layers from the same cardstocks and alternated the overlap, adding foam dots to some of the layers for pop.  I then finished off the card with a teal rhinestone set with the Silhouette Rhinestone setter.  I love how the card turned out...  very simple but elegant.  Here it is:
The photo doesn't do justice to all of the embossing details you can achieve with Spellbinder dies.  The layers and texture is just incredible.  I played with the new Imperial Gold texture pieces, and those are so cool!  I now want to use them in other projects more prominently.

We should all have creative "oops" moments...  how much prettier the world would be!
-Dayle

p.s.: Hubby loved his card :-)